Getting Started with SQL Database Project Power Tools
SQL Database Project Power Tools is a free Visual Studio extension that makes working with SQL database projects easier and more productive. This guide will help you get started with the key features.
What is SQL Database Project Power Tools?
SQL Database Project Power Tools enhances your Visual Studio experience when working with SQL Server database projects. It provides a collection of useful tools for importing databases, comparing schemas, analyzing code, creating diagrams, and more.
Installation
You can install the extension in two ways:
-
From Visual Studio: Open Visual Studio, go to Extensions > Manage Extensions, search for "SQL Database Project Power Tools", and click Install.
-
From the Visual Studio Marketplace: Download and install from the Visual Studio Marketplace.
After installation, restart Visual Studio to activate the extension.
Creating a New SQL Database Project
SQL Database Project Power Tools adds project templates to make it easy to create new database projects.
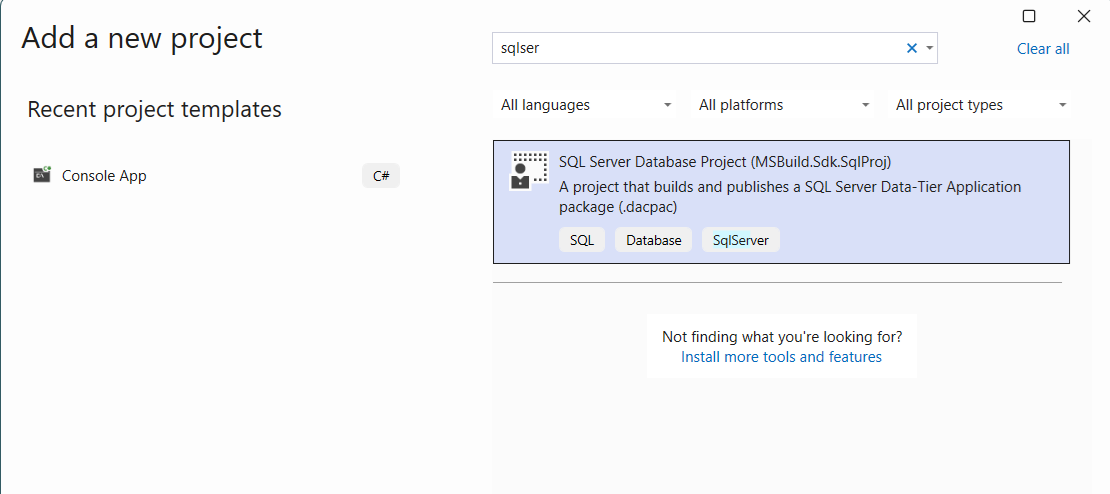
- In Visual Studio, select File > New > Project
- Search for "SQL" in the project templates
- Choose the SQL Server Database Project template
- Name your project and choose a location
- Click Create
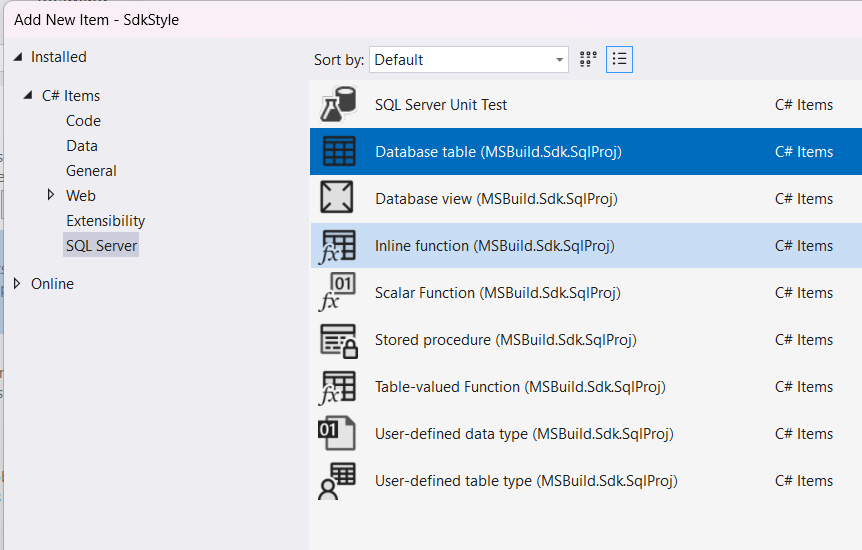
You can also add new items to your project using the enhanced item templates:
Importing a Database
One of the most useful features is the ability to import an existing database schema into your project. This saves you time by automatically generating all the necessary SQL scripts.
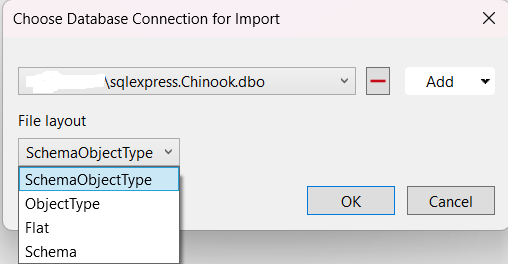
To import a database:
- Right-click on your SQL database project in Solution Explorer
- Select SQL Project Power Tools > Import database
- Enter your database connection details
- Choose the file layout for the imported objects
- Click Import
The tool will create all the necessary files in your project, organized by object type.
Comparing Schemas
The schema compare feature helps you keep your database project in sync with your live databases. You can compare in both directions:
- Compare your project with a database to see what needs to be deployed
- Compare a database with your project to update your project files
To use schema compare:
- Right-click on your SQL database project in Solution Explorer
- Select SQL Project Power Tools > Schema compare
- Choose your comparison source database and target (project or database)
- Review the differences in the generated script
- Apply the changes as needed
This is especially useful when working in teams or managing multiple environments.
Analyzing Your Code
Static code analysis helps you find potential issues in your database code before deployment. The analyze feature checks your SQL scripts against best practices and common pitfalls.
To analyze your project:
- Right-click on your SQL database project in Solution Explorer
- Select SQL Project Power Tools > Analyze
- Review the analysis report
- Address any issues found and improve your code quality
The analysis includes checks for design issues, naming conventions, performance concerns, and more. Consider adding this step to your regular development workflow.
Creating Entity/Relationship Diagrams
Visualizing your database structure is easy with the E/R diagram feature. This creates a Mermaid diagram showing the relationships between your tables.
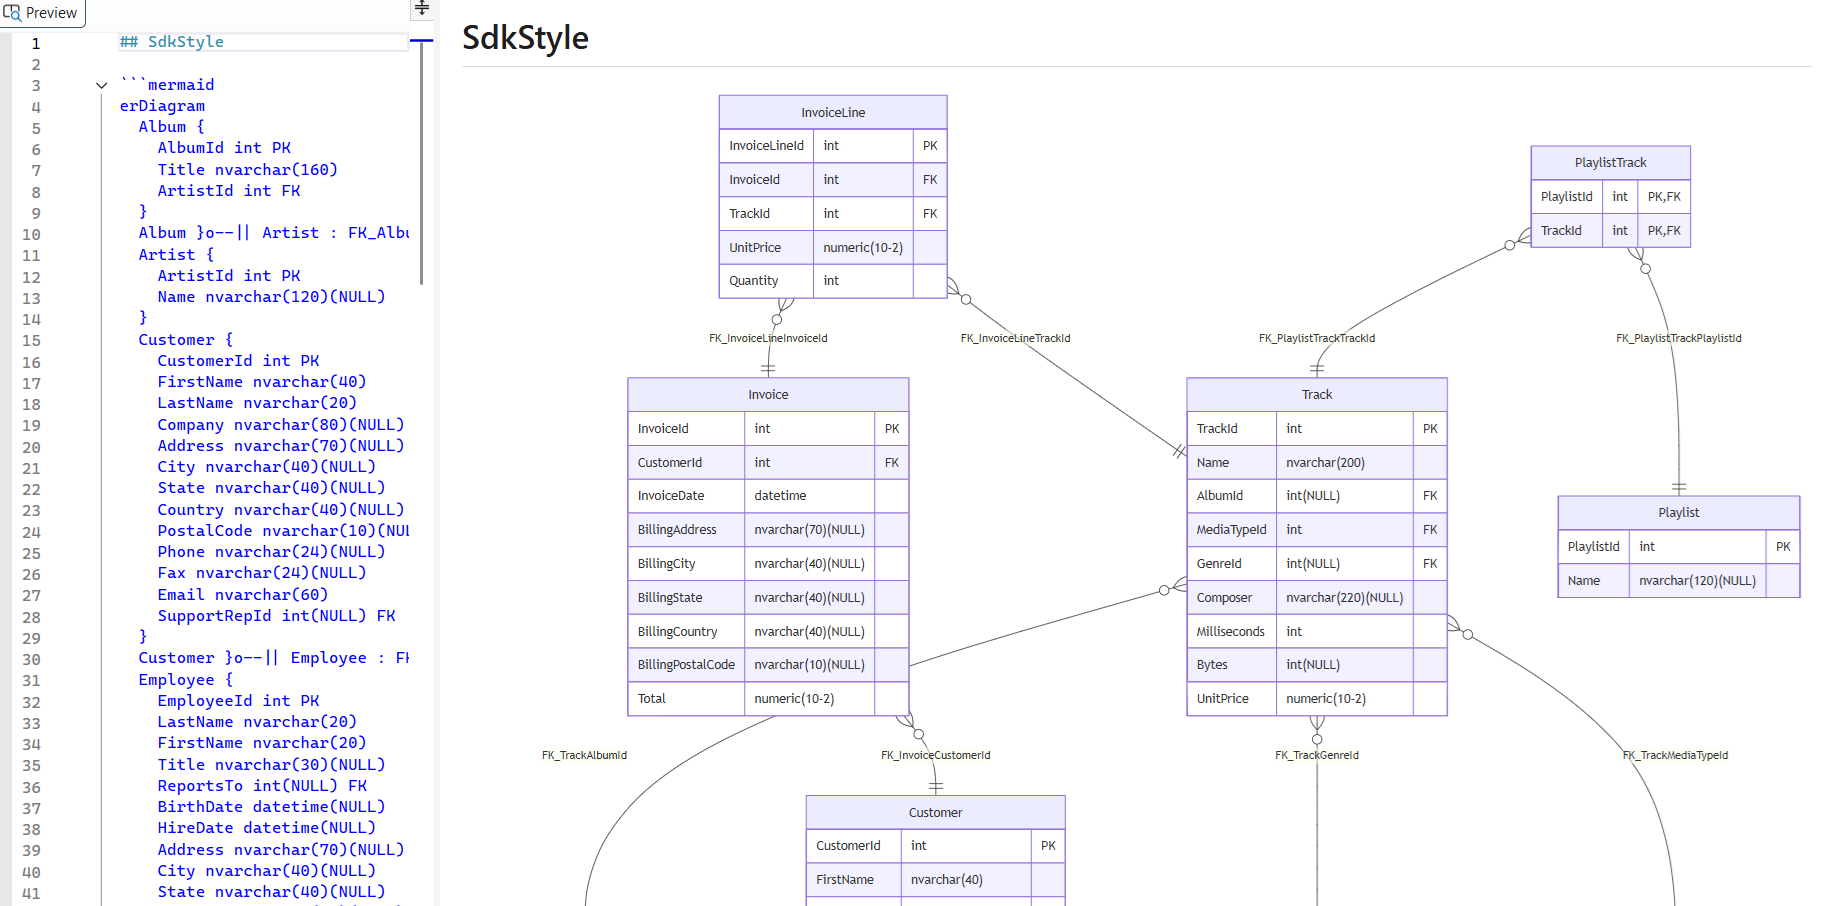
To create a diagram:
- Right-click on your SQL database project in Solution Explorer
- Select SQL Project Power Tools > Create Mermaid E/R diagram
- Choose which tables to include
- The tool generates a Mermaid markdown diagram
- View the diagram in Visual Studio or use it for documentation
These diagrams are perfect for documentation and help team members understand the database structure.
Viewing .dacpac Files
The extension adds a Solution Explorer node for the output of your project (a .dacpac file), making it easy to explore their contents.
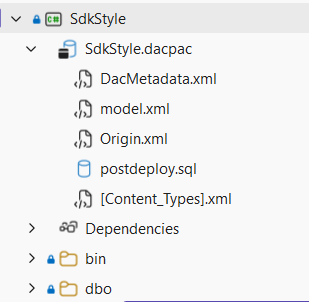
To view a .dacpac file:
- Build your project
- Expand the project in Solution Explorer
- Browse through the xml files and postdeploy / predeploy scripts contained in the package
This is helpful when troubleshooting post and predeployment script issues.
Scripting Table Data
When you need to include seed data in your database project, the Script Table Data feature generates INSERT statements for you.
To script table data:
- Select SQL Project Power Tools > Script Table Data
- Choose your data source and pick the table to script
- The tool generates INSERT statements for the table data
- The tool adds the generated script to your project in the
Post-Deploymentfolder
This is based on the popular generate-sql-merge script.
Accessing the Tools
All SQL Database Project Power Tools features are accessible from the context menu in Solution Explorer:
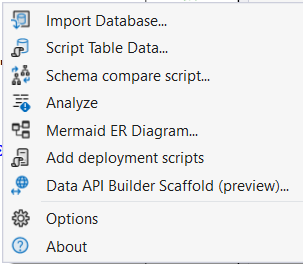
Simply right-click on your SQL database project and look for the SQL Project Power Tools menu option.
Power Pack Extension
For even more features, consider installing the SQL Project Power Pack, which includes:
- T-SQL Analyzer: Real-time code analysis with over 140 rules
- SQL Formatter: Automatic code formatting with .editorconfig support
Tips for Success
- Start with Import: If you have an existing database, use the import feature to get started quickly
- Regular Schema Compares: Keep your project and database in sync by comparing regularly
- Use Analysis: Run the analyzer before deploying to catch issues early, or integrate static code analysis into your CI/CD pipeline
- Document with Diagrams: Create E/R diagrams to help your team understand the database structure
- Version Control: Keep your database project in source control to track changes over time
Getting Help
If you need help or want to learn more:
- Review the SDK user guide for advanced topics
- Report issues or request features on GitHub
- Rate the extension on the Visual Studio Marketplace
Next Steps
Now that you're familiar with the basics:
- Create or import a database project
- Explore the various features
- Set up your development workflow
- Share your feedback to help improve the tool
Happy database development!