From Azure SQL DB to EF Core Web API using only cross platform CLI tools
Cross platform support with .NET and Azure SQL Database tools has improved tremendously in the recent years. To prove this, I wanted to test if you can expose an Azure SQL Database table from a ASP.NET Core Web API using just command line tooling. And as you can see during the process, there is still room for improvements!
First, we will create a SQL Server Database project file (a .dacpac) for easy deployment, build validation and source code control of our database objects.
The we will create a Web API with Swagger support.
Then we will generate C# code to interact with the database using EF Core Power Tools.
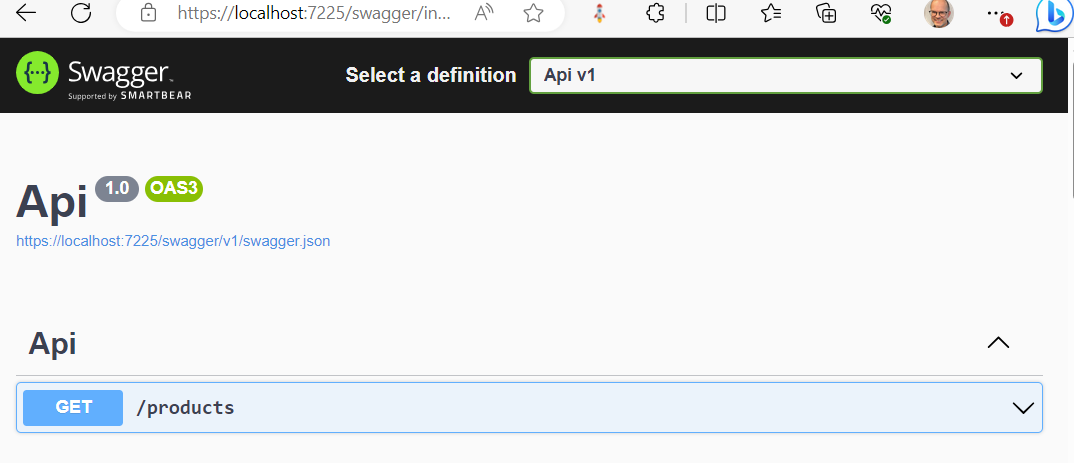
Finally, we will add a method to expose an EF Core entity, and verify that the Web API works via Swagger UI.
Install SDKs & tools
First, install the SDKs and tools needed for this, staring with the .NET 6 SDK:
Check that the .NET 6 SDK is installed by typing:
dotnet --list-sdks
Install the sqlpackage dotnet global tool used to create the database project files from an existing database:
dotnet tool install -g microsoft.sqlpackage
Install the database project template:
dotnet new -i Microsoft.Build.Sql.Templates
Install the efcpt dotnet global tool for EF Core 7, used to generate C# DbContext and model code:
dotnet tool install -g ErikEJ.EFCorePowerTools.Cli --version 7.0.*-*
Create the database project - .dacpac package
Run sqlpackage to create .sql scripts for all objects from the Azure SQL Database in a folder:
sqlpackage /a:Extract /p:ExtractTarget=SchemaObjectType /tf:AdventureWorks /scs:"data source=myserver.database.windows.net;initial catalog=AdWorks;user id=sqlfamily;password=sqlf@m1ly;encrypt=True;Connect Timeout=60"
For details on the sqlpackage extract action syntax, see the documentation here.
Use the sqlproj template to create a new SQL project:
dotnet new sqlproj -n AdventureWorks
Finally, you can build a .dacpac package, which can be used to publish the database schema in your deployment scripts and as the basis for code generation in the following steps.
dotnet build .\AdventureWorks\AdventureWorks.sqlproj
You should see output similar to this, to confirm that the .dacpac package is built:
  Writing model to C:\Temp\PowerTools\AdventureWorks\obj\Debug\Model.xml...
  AdventureWorks -> C:\Temp\PowerTools\AdventureWorks\bin\Debug\AdventureWorks.dll
  AdventureWorks -> C:\Temp\PowerTools\AdventureWorks\bin\Debug\AdventureWorks.dacpac
Create ASP.NET Core Web API project
Add a new ASP.NET Core Web API using the webapi template:
dotnet new webapi -f net6.0 -n Api
Remove the WeatherForecast.cs class and the Controllers folder, part of the templates, but not needed:
del Api/WeatherForecast.cs
rm -r Api/Controllers
Generate EF Core DbContext and entity classes from the database project
Run efcpt to generate DbContext and entity classes in a Models folder in the Api project:
cd Api
efcpt "../AdventureWorks/bin/Debug/AdventureWorks.dacpac" mssql
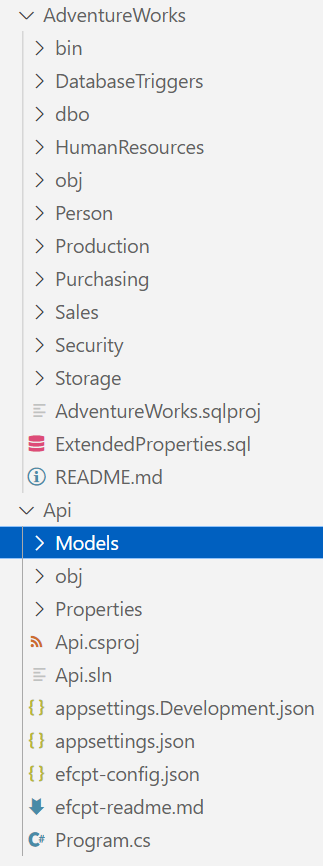
This will generate EF Core C# code for the database objects in the AdventureWorks.dacpac file and place them in a Models folder under the Api project.
Your folder structure should now look similar to this:

Add Web API endpoint and use EF Core DbContext
Add the Entity Framework Core SQL Server/Azure SQL provider NuGet package to the API project:
dotnet add package Microsoft.EntityFrameworkCore.SqlServer
Enable user secrets and add the connection string to them (so the connection string is not included in your source files).
dotnet user-secrets init
dotnet user-secrets set "ConnectionStrings:DefaultConnection" "data source=myserver.database.windows.net;initial catalog=AdWorks;user id=sqlfamily;password=sqlf@m1ly;encrypt=True;Connect Timeout=60"
And finally update Program.cs with your favorite CLI based text editor (or VS Code) to use the EF Core DbContext and expose an API endpoint:
code Program.cs
The complete Program.cs file:
// Added
using Api.Models;
// Added
using Microsoft.EntityFrameworkCore;

var builder = WebApplication.CreateBuilder(args);

// Add services to the container.
// Added
builder.Services.AddSqlServer<AdventureWorksContext>(builder.Configuration.GetConnectionString("DefaultConnection"));

builder.Services.AddControllers();
// Learn more about configuring Swagger/OpenAPI at https://aka.ms/aspnetcore/swashbuckle
builder.Services.AddEndpointsApiExplorer();
builder.Services.AddSwaggerGen();

var app = builder.Build();

// Configure the HTTP request pipeline.
if (app.Environment.IsDevelopment())
{
    app.UseSwagger();
    app.UseSwaggerUI();
}

// Added
app.MapGet("/products", async (AdventureWorksContext db)
    => await db.Product.ToListAsync());

app.UseHttpsRedirection();

app.UseAuthorization();

app.MapControllers();

app.Run();
You can now run the Web API app:
dotnet run
You should see output similar to
info: Microsoft.Hosting.Lifetime[14]
    Now listening on: https://localhost:7038
Open a web browser and navigate to the Swagger UI https://localhost:7038/swagger to test the API.

Congratulations, a .dacpac database project, EF Core DbConext and Web API all from the command line and cross platform!